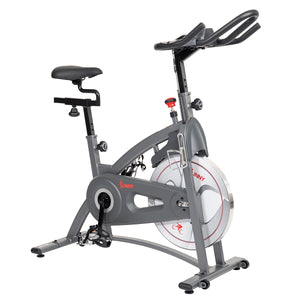
Just like your car requires maintenance to keep running smoothly; an indoor exercise bike also requires a little tender love and care over the course of its life. Thankfully, maintenance for an exercise bike is generally quick and easy and can greatly improve the life of your equipment! Check out our top tips for exercise bike maintenance below.
How To Install a Pedal
When you install the pedals on your bike, you’ll want to make sure you install them correctly so you’re both comfortable and safe as you cycle. This helpful exercise bike maintenance tip can be used not only when setting up your bike, but also when replacing your pedals down the road. You will need a spanner and an adjustable wrench, as well as a pedal that fits your bike.
You’ll want to make sure your pedal is inserted precisely at a 90-degree angle. If the threading doesn’t line up perfectly with the crank arm pedal opening, you won’t get very far trying to screw it in.
As you begin to thread your pedal, it’s easiest to tighten by hand at first. For the right pedal, continue to screw the pedal bolt clockwise with the spanner. For the left pedal, screw the pedal bolt counterclockwise with the spanner.
Once fully attached use the spanner to hold the pedal bolt in place, while using the adjustable wrench to attach the nylon nut. Make sure everything is tightened nice and tight and you’re ready to ride!
How to Replace Your Pedal
With general wear and tear on your exercise bike, you may need to replace your pedals. You may also want to replace your pedals if you’re interested in upgrading your current pedals to SPD compatible pedals, which you are able to clip into if you own cycling shoes with SPD cleats.
To start, find pedals that have the same thread size as your bike’s original pedals. You can find the threading information in your bikes’ user manual. To replace your pedals, you’ll need a spanner and an adjustable wrench.
Once you’ve removed the old pedals, put the new pedal at a 90-degree angle, apply pressure, and twist to tighten with the other hand. Just like when you installed your pedals originally, for the right pedal, continue to screw the pedal bolt clockwise with the spanner. For the left pedal, screw the pedal bolt counterclockwise with the spanner.
Once fully attached use the spanner to hold the pedal bolt in place, while using the adjustable wrench to attach the nylon nut. Make sure everything is nice and tight and you’re good to go!
How to Tighten Your Pedal
If you cycle regularly, you’ll want to make sure you’re tightening your pedals regularly. As pedals come loose, you may hear a squeaking sound, or it might feel a little off as you cycle. It’s important you tighten your pedals to ensure your bike is safe, and that your feet are anatomically in the correct position on your bike.
To do this you’ll need a spanner and an adjustable wrench. Use the spanner to hold the pedal bolt in place as you tighten the nylon nut with the adjustable wrench.
How to Lubricate Brake Pads
Finally, lubricating your felt brake pads is important maintenance for your exercise bike. This will keep your bike running soft and smooth. Check the user manual on your bike to learn is the brake pads come pre-lubricated. If not, you’ll need to brush on the lubricant when setting up your bike.
Lubrication should be checked on a weekly basis and done regularly to keep your cycle bike rides silky smooth.
To lubricate your brake pad, start by loosening your tensioner to the lowest setting. Remove the felt brake pad from your bike and spray it with a silicon-based lubricant. Replace the brake pad on your bike.
Hopefully, this guide was helpful to helping you get started with general maintenance for your exercise bike. As you can see, with easy, regular maintenance your exercise bike will be sure to live a long and happy life!


Add Your Name & Email
Please enter your name and email to continue.We won’t display your email publicly.