


Published on 10/4/2019, Updated on 8/25/2021
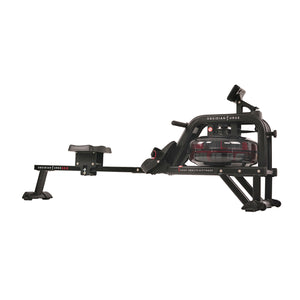
Rowing is a great way to incorporate a full-body workout into your fitness routine. When rowing, you can strengthen your cardiovascular system, increase muscle endurance, and improve core strength.
In particular, you can condition your hamstrings, glutes, back, and bicep while rowing. The exercise also encourages proper posture.
Even though rowing has several benefits and is a low-impact movement, you can still cause injury to your lower back, wrists, and knees if performed improperly. Perfect rowing form takes time. Therefore, we encourage constant practice to achieve smooth and powerful strokes.
To help you reduce your risk of injury, we’ve created a step-by-step guide on proper rowing machine form. We’ve mapped out the different positions and critical points that will enhance your rowing form.
Proper Rowing Technique:
Before you begin rowing, sit down on the rowing seat and place your feet on the foot pedals. Then, while sitting up straight, bend your knees and slide forward to put your feet on the pedals completely.
Use the adjustable straps to secure your feet to the pedals. If your foot pedal supports it, use the foot length adjuster to help the pedal match your foot length comfortably.
Next, lean your body slightly forward with your back straight and extend your arms to grab the handle. Your hands should have a loose yet stable grip on the handlebars
STEP 1:
The rowing motion initiates from your legs. Push throw the heel and mid-foot to drive your body back while keeping your arms straight while maintaining a firm grip on the handle. It is important to note when pushing through the foot pedal not to straighten your legs completely.
Fully straightening your legs after a hard power stroke could cause the knees to lockout and overextend, resulting in possible injury to the knee joint and surrounding tendons and ligaments.
STEP 2:
Just before you finish your leg push, begin to pull on the handlebar while bending your elbows. Start to lean back slightly while keeping your head and neck straight as you pull with your arms.
STEP 3:
Using the muscles in your back and biceps, pull the bar to the area between your navel and lower chest. Keep your elbows close to your body as you are finishing the pull. A slight backward lean helps pull the rowing cord slightly further, generating a more powerful rowing stroke.
STEP 4:
To return to the starting position, let the arms extend first. Lean forward slightly while maintaining an upright posture and tight core. Next, bend your knees to slide the rowing seat forward into the starting position.
When returning to the start position, it is essential to extend your arms first before bending your knees. If you don’t, then you might hit your knees with the handlebar.
The 4 Proper Rowing Positions
Rowing Position 1 – “The Catch”
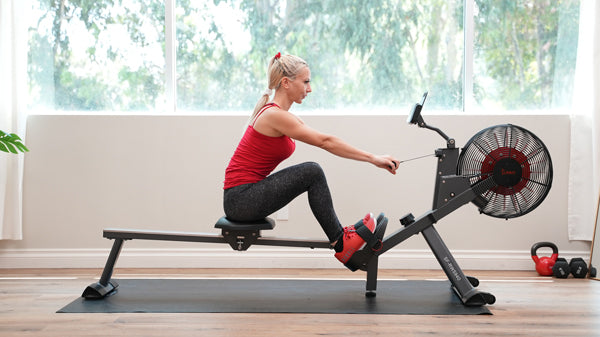
A: Grip the handle firmly while keeping the wrists flat.
B: Arms extended out toward the flywheel.
C: Maintain an upright posture with a slight forward lean.
D: Knees bent to keep the seat in a forward position.
Rowing Position 2 – “The Drive”
A: With arms extended, press through the foot pedals.
B: Keep your posture firm and upright with a tight core.
C: Before your legs reach near full extension, start to pull on the handle and lean back slightly.
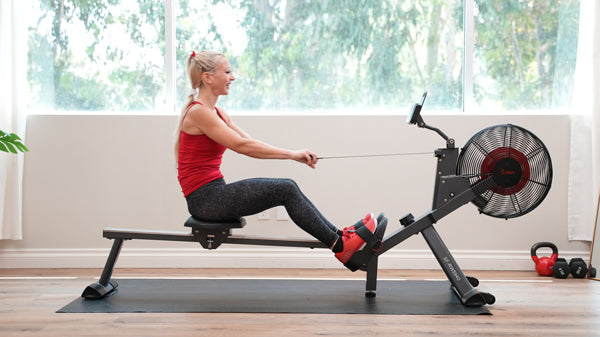
Rowing Position 3 – “The Finish”

A: Pull the handle all the way towards the space between the navel and chest.
B: Exhale while continuing to bring your legs to near full extension and lean back.
Rowing Position 4 – “The Recovery”

A: Extend the arms toward the front of the rower.
B: Lean your torso forward, following your arms toward the front of the rower.
C: Then bend your knees allowing the hips to slide the seat back into “The Catch” position.
D: Inhale before your next stroke!
Follow these four steps to achieving proper rowing machine form. Rowing is one of the more technical cardio options but extremely fun and effective.
First, practice your technique and film yourself to critique and perfect your rowing form. Then, get started on your rower with this technique-focused video. Happy rowing!


2 comments
Rowing is my favorite!
Rowing is my favorite